

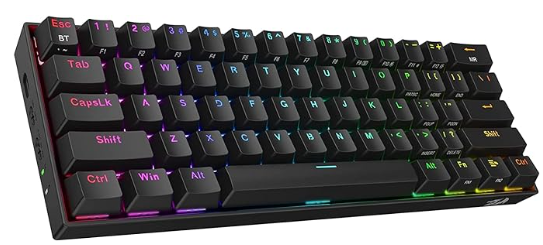

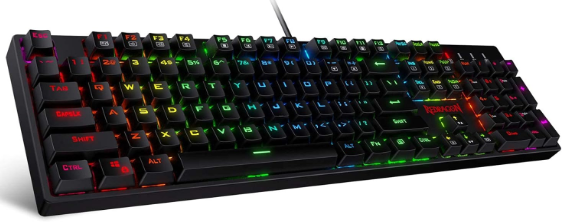
Here we are with a 60% keyboard. This time, this even smaller K530 model. As for that true-typing experience I was chasing, I’m certainly experiencing more of that. Read on for my thoughts for the K530 Dragonic.
Using the K530 as my daily driver
The first 3 days I took this to work, and I had a mixed experience. For purely typing, this is great. The sounds are fantastic, the tactility from the outemu browns feel really good, and doing some n-key rollover tests show this registers all the possible keys I can press (about 40 at a time). The bluetooth feature came in handy for switching between laptop / phone / desktop. I loved the fact that my desk space immediately increased, and it looks very minimal. Professionally minimal as I like to think. For things like web-browsing, replying to emails, and gaming this is truly a great experience. I’ve yet to use the macros, but I’ll soon figure out how they work.
Pro’s
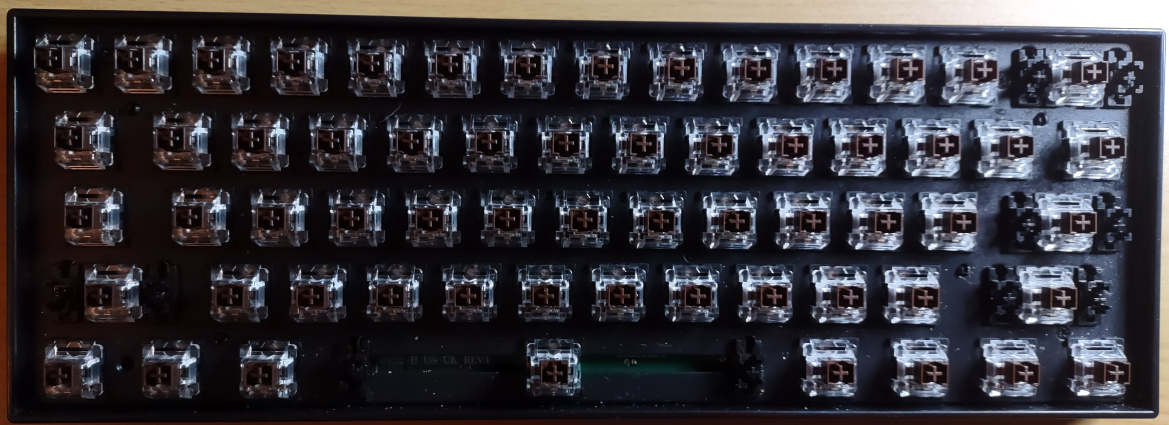
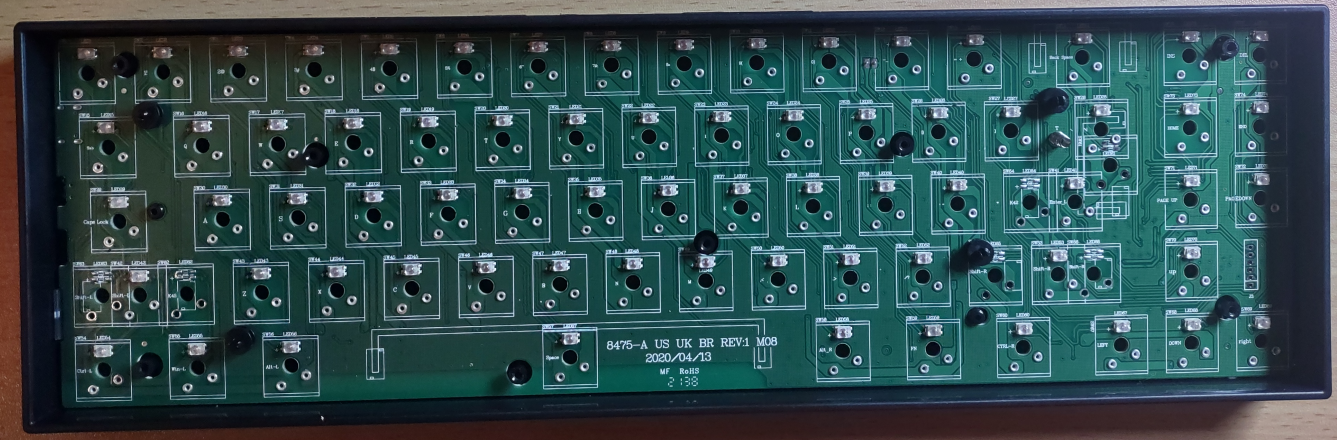
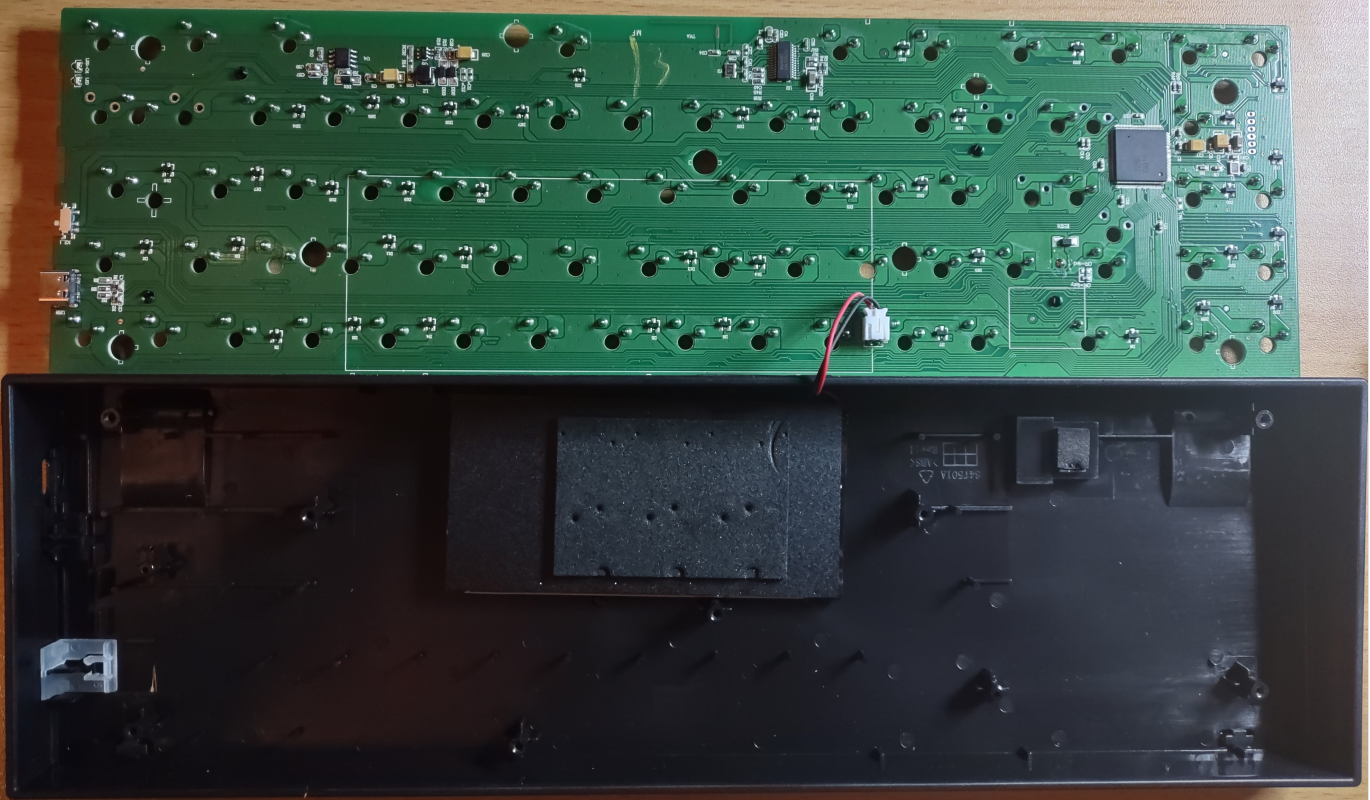
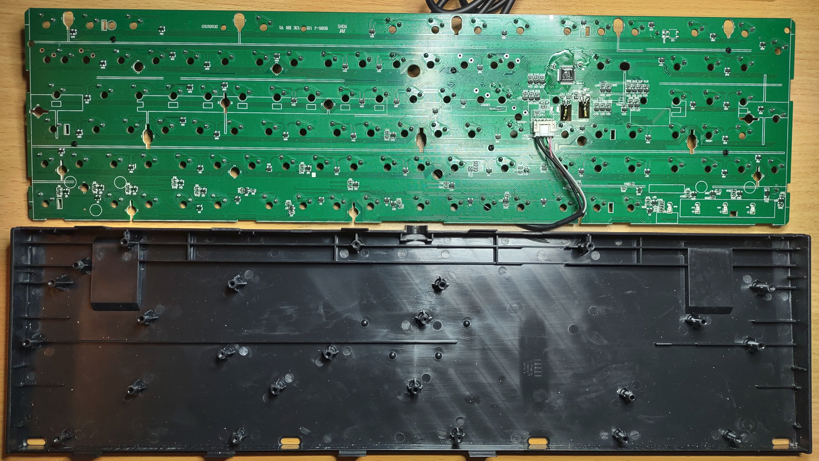
The K530 delivers on a small, effective package that punches above it’s price point. The board feels incredibly stiff, and during disassembly I was happy to find a metal backplate. The USB-C connector works fine, and is now alongside the collection of other USB-C cables on my desk. Removal of keys and switches is straightforward, and the backplate is held in by 7 machine screws. The underside board houses the 3000maH battery with one connector. I love using bluetooth on this keyboard, and simply moving it out of the way when I need more desk space. With the ability to connect 3 different devices with the flip of a switch was certainly the highlight of my day. Punching out paragraphs with the brown switches feels effortless and satisfying. I may have found that true-typing experience!
- Portable size!
- Triple Bluetooth connectivity
- Removeable USB-C
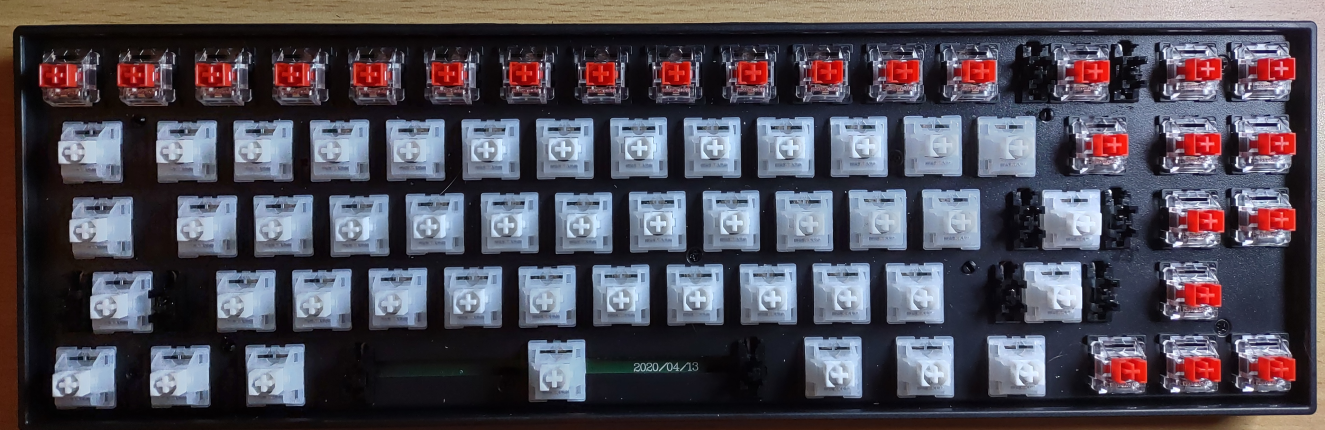
- Hot-Swappable switches
- Multiple backlight options
- Metal backplate
Con’s
I have to put the disclaimer here that I’m an avid typer, but I still use a full range of Microsoft Office products in my day-to-day. Please keep that in mind while reading this.
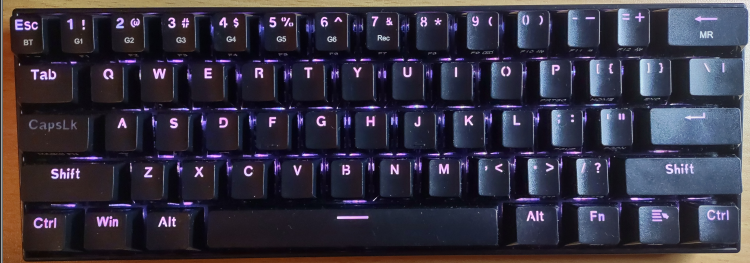
The lack of arrow keys along the right-hand side feels weird. I still find myself hitting the bottom right ctrl key when looking for the arrow key. Redragon’s solution is to use the FN+A, FN+S, FN+D, FN+W for those arrows, and it feels alien to my brain. Apparently I’ve been using a 104 keyboard for much too long, since I’ve also grown accustomed to ctrl+shift+arrow to highlight a word. With the K530, I have to use FN+ctrl+shift+arrow, that’s 4 separate keys. This is however the trade-off of a super small 60% keyboard. The entire top row pulls triple duty with the use of not one, but two function keys. Spreadsheets are also frustrating to use; the pgup/pgdn/home/end are all fn+ key, I find myself switching to my regular 104 membrane keyboard for such occasions.
Also using Win+Arrow to snap windows is also a bit of a chore. The combination is :
win + fn + (arrow). The combo cannot be:
fn + win + (arrow).
Even sometimes that combination (in that order) doesn’t work. This could be that the get-focus function on whatever I’m working on is well, focused. But there are times when I feel that these keys have a mind of their own.
The K530 also eschews any multimedia keys. Whereas the K582 and K599 both offered volume control, global media keys for music playback. Again, I’m sure this was done purposely for the small size and to avoid giving quadruple duty to any keys.
Compared to it’s big K582 and K599 brothers, the amount of lighting effects is also much less. There’s no way to change the color of each key unless using the software
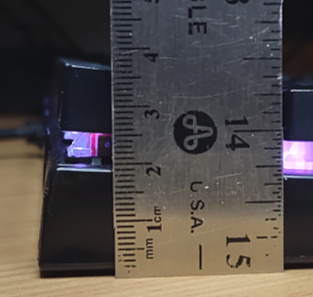
In my last review of the K599 60% board, I also mentioned the height of the board being high, the K530 is no different. However, I’m getting used to them, and actually prefer them now.
- Some adjustments coming from a 104 style keyboard
- fn + WASD left handed arrow keys
- fn + key for LOTS of other things, sometimes triple keys
These gripes are however, all based on the last 20 years of using a very particular style of keyboard. If I had started with the 60%, and moved my way up, I’m sure my opinion would be very different. I am VERY keen to practice more on this keyboard, and over time I’m sure I’ll love using this form factor.
Other items of note
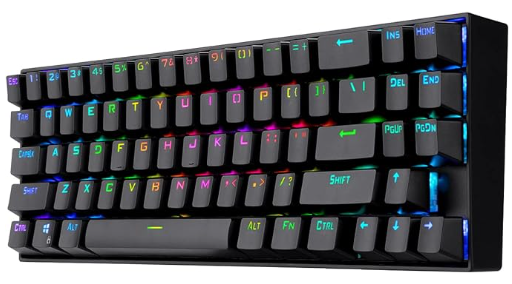
I noticed this because I have 2 other Redragon brand keyboards; the font on the keys (legends) are different. See below, the top QWERTY row is from my original K582 Surara, and the bottom row is the K530 series.

My theory is that the K582 and K599 are using a ‘gamer/hacker’ style font, since they’re marketed for the gamer community. Whereas the K530 seems to be marketed for the typist (or just general user who prefers a 60% keyboard). The gamer/hacker font is a boxier style that fills more of the keycap, while the latter font is more of a sans-serif style. The sans-serif style for the K530 is likely smaller to accommodate for the double/triple duty some keys are doing with side legends.
See below, the top 1 thru 0 row has at least 3 different functions to suit the rest of the board.

Escape key = Esc, Bluetooth pairing, tilde ~, and backtic `.
1 key = 1, F1, and macro1
And so forth.
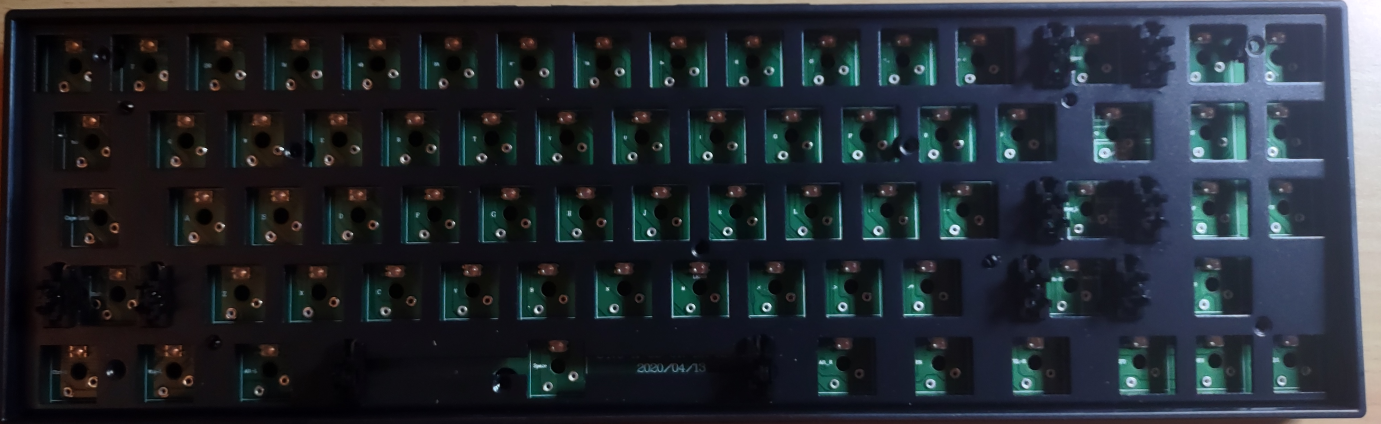
Disassembly
I picked up the K530 as a kijiji sale by itself. I didn’t get a box, just this keyboard and third party USB-C connection. I already had a switch puller, keycap puller and a bunch of spare outemu switches. I would imagine purchasing this new from amazon includes all that, manual and likely some spare switches.
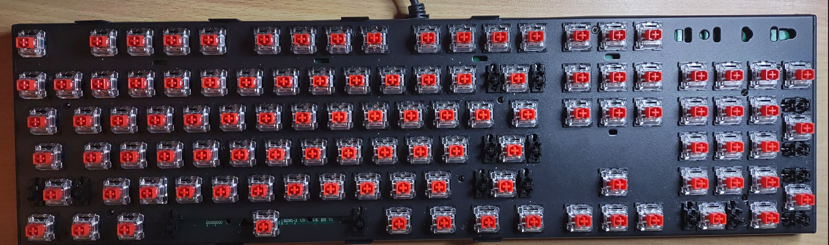
I like that this board, much like the K599 doesn’t have a top ‘snap-on’ vanity cover. Disassembly was taking off the keycaps, taking the individual switches off, and 7 machine screws to remove. The entire top, metal (!) pops off, and you can access the battery and ports along the left-hand side in case you need to clean or do some maintenance.


")


