Synology DS420+ review

C:\CE496225\37E7B726-D2B5-4491-A22C-B72D069EC170_files\image001.png


Introduction

A little over 7 years ago, I purchased a DS413J. It was everything I needed; lots of storage, ample power, and served media in the house suitably well. Fast-forward to 2020, the DS413J is feeling rather aged. The Web UI and 2FA login sometimes takes a little longer than two minutes to fully login. Transfer speeds at 30Mb/s feels unimpressive, and it takes sometimes up to 10 minutes to reboot.

I decided it was time to get into a DS420+. This would serve as my main file/media share while to leverage the CPU, upgradeable RAM and much improved performance.


History

Synology mainly deals in networking products. The company started with consumer network storage, and have expanded into IP surveillance, and consumer router hardware. Synology’s network storage is pliable across consumer to SMB all the way to corporate SAN. This is also where they really shine. A NAS – Network Attached Storage runs file shares without the overheard of a running server that consumes space, cooling, network, licensing, and power. Most of the NAS models – the DS series, which I’ll cover below are small, quiet, and very unassuming.

The consumer NAS market is competitive, with names like QNAP, Terra Master, Western Digital, Drobo, and Buffalo to name a few. While I won’t go into each of those name brands, I typically see consumers here in Canada picking between QNAP and Synology.

If you’ve ever wondered about the naming convention of the Synology NAS devices, I’ve broken it down here:

Synology DiskStation naming explained
  • 1 – Leading letters [DS][RS][DX]. DS – Diskstation (the formfactor you see here). RS – RackStation (Rack mounted NAS). DX – Diskstation Expansion, and so on.
  • 2 – The first number(s). Sometime a single digit. This is the maximum amount of internal drives the NAS can house, with expansion units. [ie. A 1812+ = 8 disks in unit, with 10 extra disks from expansion units allowed]
  • 3 – The last 2 digits. Demarks the year released. [DS413J = released in 2013, DS420+ = released in 2020]
  • 4 – The very last character denotes the performance. This does change depending on the market segment. Generally, the most common ones are J= home entry level, Play = media specific functions with some encoding, Plus (+)= performance level, XS = Top tier specifications.

Audience

Who buys a NAS? Who is it meant for? A NAS is meant for anyone with lots of data that needs to be securely and safely stored in a central location. I emphasize ‘central’ because we all know the pain of multiple USB drives. While convenient, they do end up in odd places or sometimes misplaced when you need them.

This is where a NAS steps in. One location for storing all the files, easily accessible by smart devices, and more flexible and cost friendly over cloud storage. A NAS can also stream media; which means you have the option to watch any owned, stored media on your device of choice. And, no streaming service fees either.

The Synology Diskstation Manager also offers a massive menu of different applications; security, webhosting, authentication, and surveillance. For guys like me, there’s Virtual Machine manager, Radius Server, Active Directory integration – the list keeps growing.

Hardware

CPU

Intel Celeron J4025 2-core 2.0GHz, burstable up to 2.9GHz

Memory

2GB DDR4 [expandable to 6GB]

HHD Bays

4 x 3.5″ or 2.5″ SATA HDD/SSD (not included)

2 x M.2 2280 NVMe SSD (not included)

USB

2 x USB 3.0 (front and back)

LAN

2 x 1Gbe RJ-45

AC

100 V to 240 V AC

HD Drive bays are all plastic and screwless. Everything has markings for sliding into the standard 3.5″ HDD pin holes. Included are screws for 2.5″ HDD’s as well. Once the HD’s are in the unit, they’re snug with no vibration. There’s also a Synology Key for each drive bay to lock each independently. The front of the unit has indicator lights for status, each individual drive, and the power button. One USB 3.0 connection in the front, and one USB 3.0 in the back. Sadly, there’s no Esata connection for expanded / backup storage. The double RJ-45 connections can also be used independently, teamed, or for failover.

Network protocols

SMB,AFP,NFS,FTP,WebDAV,CalDAV,iSCSI,Telnet,SSH,SNMP,VPN (PPTP, OpenVPN, L2TP)

File System

-internal: Btrfs, ext4

-external (connected via usb): Btrfs, ext4, ext3, FAT, NTFS, HFS+, exFAT

RAID types

SHR (Synology Hybrid RAID), Basic, JBOD, RAID 0/1/5/6/10

SSD Cache

-read/write cache support

-M.2 NVMe SSD Support

File Sharing Capacity

-Max local user accounts: 2048

-Max local groups: 256

-Max shared folders: 512

-Max concurrent SMB/NFS/AFP/FTP connections: 500

Virtualization

Vmware Vsphere 6.5, Hyper-V, Citrix, OpenStack

Software

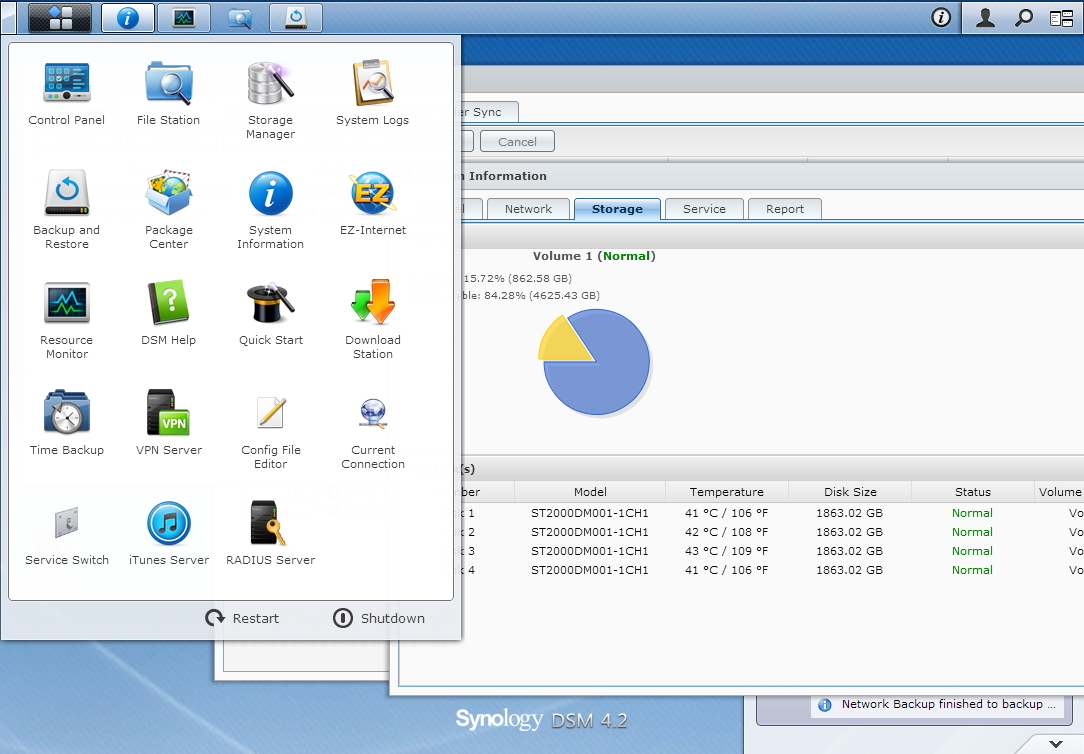
Once again, the Disk Station Manager web GUI is flawless. On initial boot you’re asked to install the latest DSM, then format any installed Hard Disks. After it reboots again, it’s off to configure your RAID storage. Interesting note here, the official spec sheet mentions Synology Hybrid RAID (SHR) as an option. On first install with 2 disks, SHR was available.

Volume Creation Wiz rd 
Configure storage pool property 
(optional) 
RAID type: 
Minimum number of driæs 
SHR 
r RAID: 
Sto g e_ 1 
SHR 
1 (SHR with only one driæ will 
able to driæ 
This is the RAID type for uærs. this type 
pu to driæs of siæ in the to optimiæ siæ and 
to data

After installing another 2 disks, SHR was absent? I have a feeling the option was quietly removed to favor disks of the same size to fit industry standards.

Storage Pool Creation Wizard 
Configure storage pool property 
Storage pool description (optional): 
RAID type: 
Minimum number of drives per RAID: 
RAID 5 Description: 
RAID 5 provides fault tolerance and increased 
RAID 5 can sustain the loss of a single drive. I 
reconstructed from parity striped across the re 
performance is severely impacted while a RAID 
space and cost are more important than perfor 
Back 
Main-storage 
RAID 5 
RAID 1 
RAID 5 
RAID 6 
RAID 10 
Basic 
JBOD 
RAID O 
hree drives is required. 
from the failed drive is 
ad and write 
D 5 is ideal when 
Next 
Cancel

SHR has the ability to protect disks of different sizes. This isn’t a deal breaker to me, but it’s worth noting for someone that’s looking for this functionality. Just to point out, it IS best practice to use disks of all the same size for any sort of RAID configuration.

The Web GUI is incredibly quick and responsive. This largely because of the Intel Celeron J4025 processor and 2GB DDR4 RAM. Even after adding 2Factor authentication, it’s much speedier than my 413J. Creation of shares, installation of new packages, configuring Media services and Video station are easy and intuitive. During my initial burn in period, I mounted some external CIFS shares around my network to copy the data onto this 420+. I was never disappointed, the new DSM even provides an estimated time of completion for large jobs.

Usability

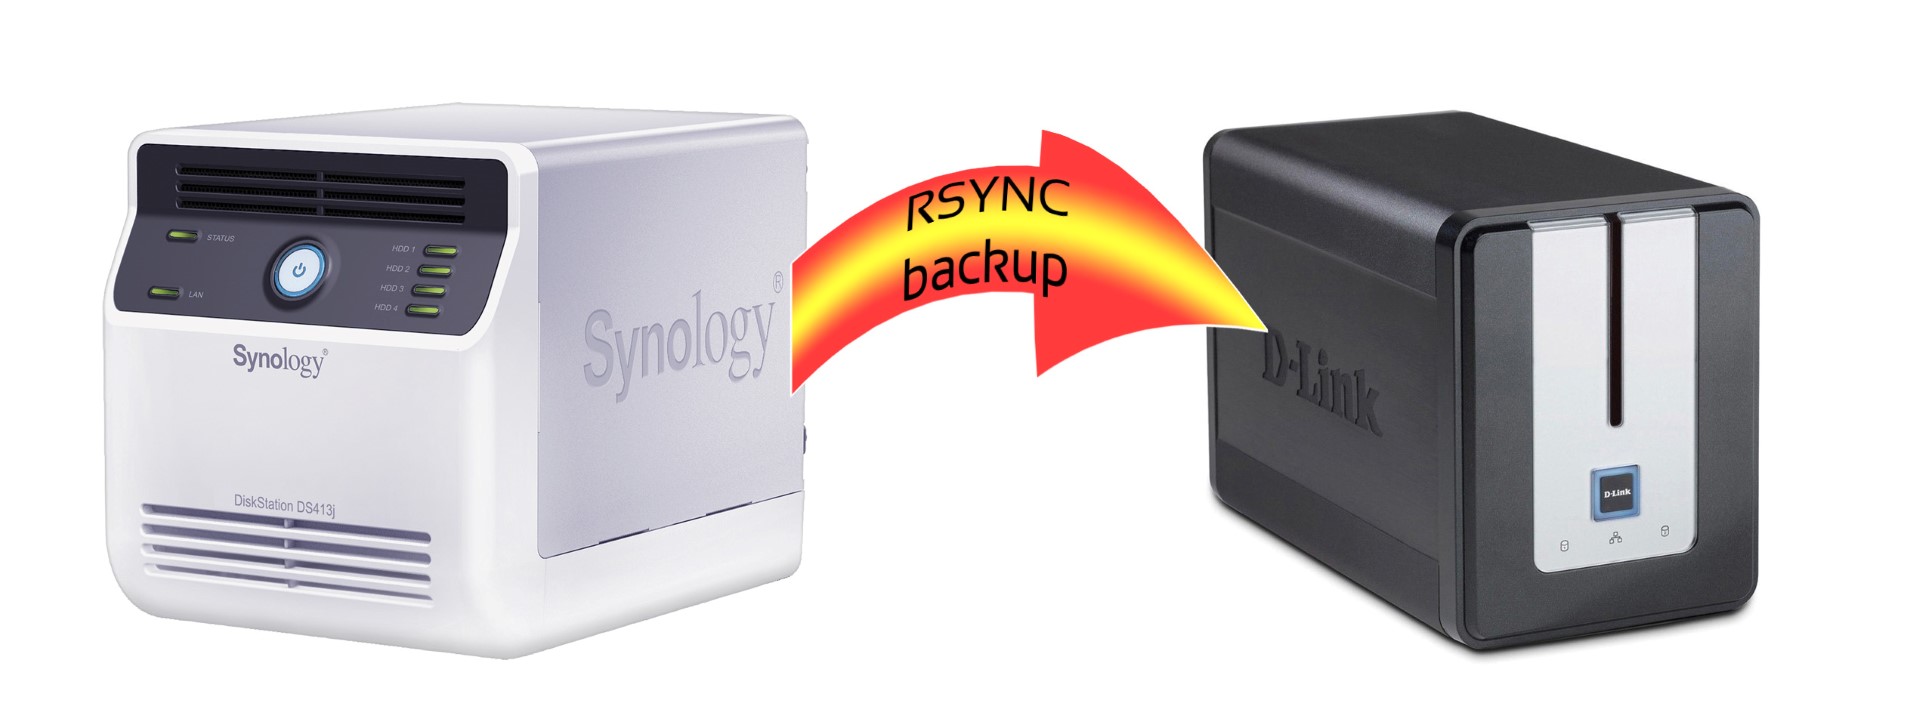
Disk Station Manager (DSM) rocks. Simple as that. Super robust, quick, snappy, it just does everything that regular desktop machine would do, just within the browser. Anything is at your fingertips within DSM. Some of the things I use on a regular basis are Hyper Backup, File station (when I want to do CIFS to CIFS transfers), Synology Drive and Storage Manager.

D isk 
Performance 
Task Manager 
Connected Users 
Speed Limit 
Settings 
Performance Alarm 
DSM Help 
CPU 
Memory Composition 
Resource 
Netvm rk 
Type : 
19.2 
Volu 
367.3 
507.8 
558.8 
Total 
4.6 Ga 
Desktop 
Click to up nctifiætions. 
Real 
utilization 8 
Ithy) 
used 3.31 TE 
capacity: 7. IE TB 
O System H It h 
Healthy 
Ym_'r S',molcgy NAS 
Resou«e Monitor 
CPU

Everything is intuitively set up. I do recommend setting Control Panel to ‘Advanced Mode’. Just in case you want to see things like the indexing service, external devices, Terminal or Privileges icons. All things are very straightforward, and the help menu is surprisingly, well, helpful. Customization of the login screen, desktop background, color theme, even image or icons are available. I’ve enabled 2FA for login, email notifications, quickconnect, media services all just by clicking around menu’s. The interface is simple enough to get you to your location, yet sophisticated and secure enough to give me comfort when I leave the house.

Features

Super Feature packed. I’ve noticed the Plus (+) series of Synology NAS offers much more packages than the plain “J” series. There’s even a beta package section I’ll be trying out soon. Each new feature brings new items to tweak, and more value to the Synology. Just the other day I configured Replication services, and Synology drive, next up will be Directory server.

It really is a dazzling array of programs this little NAS can run. There’s multiple sites that report using this strictly as a 4K Plex Server. I’ve even seen a few startup businesses using some of the bigger + (plus) models for storage and security with IP cameras. These really are customizable to no end, and based on the new up-and-coming Kubernetes images, these could one day replace traditional server technology.

The 420+ also offers an M2 cache buffer. I’m not quite using it yet, perhaps when I try out mail station or get heavier into web development I’ll populate the drives.

This also has an upgradeable RAM slot on the right of the unit to compliment the current 2GB DDR4. I’ve already got a 4GB stick in there – not best practice, I know; it should ideally be a matching 2GB stick. But I had an extra stick that matched the voltage lying around and thought I’d give it a shot. It’s been 3 weeks without any sort of hiccup.

The Android App store also has many of the general items, like file, video, audio, moments and DS cam. I also noticed there’s a Synology Chat icon in there, which I’m sure complies with secure communications between you and some friends. I’ve been using the DS finder since I have 2 NAS’s in the house, and it’s been great looking over the current usage when I run backup jobs or kube containers.

Verdict

Absolutely worth every penny! Speed, security, feature rich, and reliable name brand. Synology is really improving their DSM with every release, DSM 7.0 is already beta testing, which hopefully is a general release within 2020. My only complaint is a missing e-sata connection in the back of the unit. I could use some of the bigger DX expansion series – if I ever could fill that much space! For the price, the included features, the never-ending applications for any sort of business or personal need, this is another near perfect offering from Synology.

How to: Configure a DNS-323 (ALT-F firmware) as an Rsync Target

The last firmware released for the DNS323 was back in 2013. That was quite a while ago, and it wasn’t great. It lacked SMB2, ssh out of the box, and no development of popular applications. I tried Alt-F on a spare DNS323 as a test to see if I could get rsync up and running.

This isn’t meant to be an expansive entry of the pro’s and con’s of this firmware. This is supposed to be a straight forward approach of configuring the DNS323 as a rsync target for backups compatible with synology dsm 6.3.

Let’s not kid ourselves, this device is pretty old. The last time it was sold any where was around 2007. As of this writing that was 14 years ago. The processor is 500MHz, it’s got 64MB of RAM, the max data transfer possible is 10MBps. I do NOT recommend putting any sort of production or super-important data onto this. I’m using this because I love to tinker, and I have an over-abundance of spare harddrives. So please, as interesting as this entry is, if you want something with performance look at a modern NAS and drives with warranty and up to date specifications!

Moving along…

The coles notes version of alt-f installation:

  1. Download the latest alt-f firmware
  2. Log into your DNS323 and apply the alt-f firmware

*I take no responsibility past this point. These instructions are recommendations, and should not be taken verbatim. This is not an official support channel. Take all the necessary precautions to backup your data beforehand.

3. Create a login password, this will also act as your ‘root’ password too.

4. Format your disks. EXT2/EXT3/EXT4 and few others are available.

It’s your choice to stick with a RAID 1/0 or JBOD. I’m using older disks and this is strictly backup for my purposes.

Create the Rsync User

Let’s create an rsync user first.

Setup -> Users

Note the full name is the “windows name”, where the nic name is the “linux login” name. Take particular note of the linux name, this is what the synology needs to initiate a backup.

Machine generated alternative text:
Full name 
Nic-k name 
user id 
G roup id 
Password 
Again

Create a folder and Share

Now we’ll need to create a share to mount the backup.

Setup -> Folders

Selected: \mnt/sdb2'backu sha 
View: Tree S Flat O 
Folder Owner Group Permissions 
500Ga dtaödtaö root 
sda2 root 
root 
O db2 root 
root

Note the mounted drives. I configured mine independently.

  • Sda2 – 500GB drive
  • Sdb2 – 1000GB drive

I gave mine a share name of “backup_share”. Then hit ‘create’.

Once created, change permissions accordingly.

backup_share: 
Can Read 
Owner 
Users in group root 
Other users 
Can Write Can Browse 
Make new files/folders inherit the group ownership O O 
Apply recursively to sub-folders 
Applv also to files 
Submit Back

With the drive folder and permissions set, now configure the share.

Services -> Network -> smb -> Configure

C:\311C66C5\BFE98FFB-6B27-4F02-B0D2-952CFF370785_files\image004.png

Create a share based on the folder you created ealier

Folders Browse 
Selected: ImnVsdb2/backup_share 
View: T e C) Flat @ 
Folder: /mnVsdb2/backup_snare hit path component to visit it) 
Owner Group Permissions
C:\311C66C5\BFE98FFB-6B27-4F02-B0D2-952CFF370785_files\image006.png

As a test, make sure you can browse the share from windows explorer

Ie. (\\DNS323\backup_share)

Use the username and password you created above. Make sure you can create files and folders. Notice you can enable SMB1, and SMB2 from this panel. I tried to disable SMB1, but that just made the share disappear from my Windows 10 explorer. Could be a bug they’re working out.

Side Quest – SAMBA module

There’s also an ‘Advanced’ button in Samba Setup. Use the same root password to see the contents.

C:\311C66C5\BFE98FFB-6B27-4F02-B0D2-952CFF370785_files\image007.png

This panel is a bit more graphical in presentation. And gives a good representation with the ‘view’ icon of the current shares published. Spend a little time looking around, there could be some tweaks you could find useful in this section.

C:\311C66C5\BFE98FFB-6B27-4F02-B0D2-952CFF370785_files\image008.png

Rsync Service Setup

Let’s setup this DNS as the rsync target.

Services -> Network -> inetdS

C:\311C66C5\BFE98FFB-6B27-4F02-B0D2-952CFF370785_files\image009.png

Hit ‘configure’ on the rsync service

C:\311C66C5\BFE98FFB-6B27-4F02-B0D2-952CFF370785_files\image010.png

Configure a new folder based on the path and user you created above.

Machine generated alternative text:
- Folder Modules 
Disable 
Folder 
Browse 
Browse 
Browse 
Browse 
Module Name 
rsynrsyn 
Comment 
rsync backup directory 
Allow Browseable Read Only 
anybody
  1. It’s easier to use the built-in browser to get to your folder. Otherwise if you know it already you can enter it here. Remember, this is linux, all the directory slashes are ‘/’
  2. The module name is the viewable share name in Windows
  3. Add your comments as necessary
  4. Set permissions for the rsync account created above

Now, let’s validate the folder created above (ie. /mnt/sdb2/backup_share) exists in the rsync configuration folder. We’ll use an SSH client for this. Just regular connection with root@DNS323 works. Goto \etc and more on rsyncd.conf.

The top line should give the location of rsyncd.secrets – a password encrypted file that only rsync users should have access to.

And the bottom portion should provide the recently created directory with permissions for your rsync user.

PS C:\> ssh root@dns323-2
root@dns323-2's password:
[root@DNS323-2]# cd etc
[root@DNS323-2]# more rsyncd.conf
#Sample contents
secrets file = /etc/rsyncd.secrets
use chroot = yes
read only = yes
dont compress = *
list = yes
...

[rsynrsyn]
        comment = rsync backup directory
        path = /mnt/sdb2/backup_share
        auth users = rsynrsyn
        uid = rsynrsyn
        gid = users
        read only = no

You can tweak this to do things like host allow within a certain subnet. For this, I’m just focusing on getting rsync running.

While you’re in here, have a look at your rsyncd.secrets file. Ideally, this should only give one rsync user with password. Something like

rsynryn:password

DSM – Setup HyperBackup

Now we can create a backup job and target the DNS323 (with alt-f firmware). Create a new backup job, choose rsync as the file server type.

Backup Destination 
Please select your backup destination type. 
Synology 
folder & LJS-B 
NAS ice 
File Server

Settings should be similar to below.

For the backup settings, configure the Server type as ‘rsync-compatible server’, enter in the pertinent details of your DNS323. It should look similar to the screenshot below. For port, just keep the default 873. The Backup module, make sure to use the exact same “Path” from the rsyncd.conf file.

ie. path = /mnt/sdb2/Backup_share

Backup module = /mnt/sdb2/Backup_share

Directory = Backup_directory

And this creates a new directory of whatever name you want.

Backup Wizar 
Backup Destination Settings 
Specify the backup destination for this task. 
backup tuk 
type: 
or IP 
Tænsfer 
module: 
Di recto 
Relink to task 
dE323-2 
Ex;crt shared folder (including an deve

After this you should be able to select items to backup. Set your items, schedule them and make use of the rotational backups (very handy).

Be aware of the speeds, even if you have SMBv2 enabled, the backup jobs are still pretty slow over rsync. Still hovers around 1.2MB/s. So time your backups accordingly, and be aware that DSM Hyperbackup cannot do simultaneous backups.

-Dexter

How to: turn a DLink DNS-323 into a Rsync backup location

Rsync backups

*Updated Jan 21, 2021*

After purchasing a Synology DS-413J to replace my DNS-323 device, I wanted to repurpose the old NAS into a backup server.  In my mind, I pictured using a Richcopy or Robocopy scheduled task from a Windows machine to talk to the 2 devices.  As it turns out, both the NAS’s can speak the same language (linux) and there’s a handy little tool that takes a couple steps to do, but is well worth the effort if you want re-purpose a DNS-323.

DNS-323 instructions: You need Funplug!

1. Funplug instructions have been around for a while, NAS-TWEAKS has an excellent blog style article you can follow.  Here’s the cole’s notes version:

-After reformatting your DNS-323 device, download the fun_plug file and fun_plug.tgz and place them on the ‘volume_1’ share of your DNS-323.

reboot the DNS-323 connect via telnet to port 23 (no password required at this point)

-install the extra packages onto your DNS-323 (particularly, RSYNC) which is included:

rsync -av inreto.de::dns323/fun-plug/0.5/packages .
funpkg -i *.tgz
-enable root, and set a password
pwconv
passwd
login
store-passwd.sh
-enable and auto restart ssh services
cd/mnt/HD_a2/ffp/start
sh sshd.sh start
chmod a+x sshd.sh

Issue this command so you’re not just stuck with the busybox-only prompt:

usermod -s /ffp/bin/sh root
Change the default directory in ssh to something more familiar:
usermod -d /mnt/HD_a2/ root

That’s the most condensed version of Funplug I can give you guys, there’s lots of more minute details, but for now that will do to get what’s necessary: RSYNC and SSH services on the DNS-323.

2. Configuration of RSYNC requires some small knowledge of text editor vim or ‘vi’ as the busy box package has. First, SSH in with the root account, and create a new file named rsyncd.conf in the /mnt/HD_a2/ffp/etc directory:

login as: root
root@DNS323's password:
root@DNS323:/mnt/HD_a2# cd/ffp/start
root@DNS323:/mnt/HD_a2/ffp/start# sh rsyncd.sh status
rsync not running
root@DNS323:/mnt/HD_a2/ffp/start# cd ..
root@DNS323:/mnt/HD_a2/ffp# cd etc
root@DNS323:/mnt/HD_a2/ffp/etc# vi rsyncd.conf

The contents of rsyncd.conf should look like the below:

# /ffp/etc/rsyncd.conf configuration file
max connections = 2
secrets file = /ffp/etc/rsyncd.secret

use chroot = false
read only = no
list = false
strict modes = false
hosts deny = *
timeout = 600
dont compress = *.gz *.tgz *.zip *.z *.rpm *.deb *.iso *.bz2 *.tbz 
*.mkv *.avi *.mpg *.jpg *.rar
pid file = /var/run/rsyncd.pid

[File Backups]
hosts allow = 192.168.0.1/24 #your local network IP range
read only = false
gid = backup
uid = backup
auth users = backup_user 
path = /mnt/HD_a2/Backup_directory #Path of Backup on DNS unit

I’ve highlighted the lines you’ll need to change:

hosts allow
= This is the IP Address range of your local network, the above example is for a standard Class C network, make the appropriate changes to yours. The /24 denotes the type of subnet mask you’re using. /24 pertains to a standard 255.255.255.0, this typically will fit your home network. Otherwise, here’s a cheat sheet on subnets.

auth users
= This user has to be created through the DNS-323 web server. You can stick with the standard ‘Admin’ account if you want, but for security purposes it’s a good idea to have a separate one for backup jobs.

path
= is the path on your DNS-323 of where you’re going to backup your data.

3. After saving rsyncd.conf, you’ll have to create a new file, rsyncd.secret:

root@DNS323:/mnt/HD_a2/ffp/etc# vi rsyncd.secret

Contents of rsyncd.secrets is very short as it contains the username and password of your backup user authenticated from rsynd.conf:

 #One line per user; a User ID:(colon)then password 
backup_user:password

The command is just one line, username:password. This is where you fill in the username and password created in the web interfaced of your DNS-323, and specified rsyncd.conf.

root@DNS323:/mnt/HD_a2/ffp/etc# sh /mnt/HD_a2/ffp/start/
rsyncd.sh status
rsync not running
root@DNS323:/mnt/HD_a2/ffp/etc# sh /mnt/HD_a2/ffp/start/
rsyncd.sh start
Starting /ffp/bin/rsync --daemon --config=/ffp/etc/
rsyncd.conf

you can also run

sh rsyncd.sh status

To see if the Rsync service has been started properly. I would also recommend making sure that Rsync starts up with the DNS323 on each reboot or power off

root@DNS323:/mnt/HD_a2/ffp/start# chmod a+x rsyncd.sh

Now we configure the Synology to backup to RSYNC services on the DNS323

*New Screenshots compatible with DSM 6.2.3 added Jan 21, 2021*

4. After logging into DSM, goto Hyperbackup, open the backup wizard to open a new job. Choose ‘Data backup task’

For the Backup Destination type, choose RSYNC

For the backup settings, configure the Server type as ‘rsync-compatible server’, enter in the pertinent details of your DNS323. It should look similar to the screenshot below. For port, just keep the default 873. The Backup module, make sure to use the exact same “Path” from the rsyncd.conf file.

ie. path = /mnt/HD_a2/Backup_directory

Backup module = /mnt/HD_a2

Directory = Backup_directory

After you hit, next DSM will test the connection for you. As long as you’ve configured the RSYNC on the DNS-323 and started the service, DSM should pick it up. After you choose your backup selections, make a schedule; set it and forget it.

Items to keep in mind
*Rsync is not hailed for speed!. On average RSYNC only travels at around 1.5-4MBps.

*Synology Hyperbackup cannot run simultaneous jobs. This means if you’re backing up a lot of data, it will take a while! Plan Accordingly, take offline backups to USB, whatever your use case scenario might be.

-Dexter

Synology DS413J review

DS413J-oh yeah (Small)

I was overjoyed to get a bigger NAS device.  Mainly because my Dlink 323 was running out of space, and I yearned for something with a little more usability and functionality.  I shopped around looking and compared the QNAP, Synology, Thecus, WD, and even some Drobo units.  Smallnetbuilder’s NAS charts were a huge help in getting what I wanted.  I’m not here to plug them, I just think they have a lot of useful content and reviews that were suited to what I was looking for.
Moving away from the very consumer based Dlink 323, which was tapped out at 12MBps, I found myself in want of something faster and up to date. Synology’s hardware was sound, with a proprietary hybrid RAID, and a kick ass WebUI that simply destroyed the competition.  I originally was hooked on getting the DS1512 +, the price being the breaking point factor in this scenario.  I eventually went with the DS413J with 4 x 2TB 7200RPM Seagate Drives.  Consider that I was able to purchase the DS413J and four hard drives, the cost of the DS1512+ without hard drives was still MORE expensive.

All the reviews put the Synology Disk Station Manager (DSM) as the multi-faceted powerhouse to which all other NAS devices should follow, and it’s easy to see why.  You can drive the unit entirely from a browser any where, has plentiful plugins and offers usability for beginner to expert levels.

First Impressions
The DS413J came in a very marketing-manager-friendly box, plenty of pretty pictures and an overall glossy feel at least made me feel like I had made a worthwhile investment.  I was a little shocked to discover there was no manual with this unit, Synology smartly eschewed a physical one for a PDF attached to disk.  A nice little touch.  The unit was immaculate, pristine and wrapped with care in a sheen of plastic wrap and free of dust and any other particulates.  Unboxing the NAS felt more like working with a professional scientific instrument instead of a toy, it’s well put together and presented that it just has that feel to it.  I wasn’t crazy with the white plastic encasing the unit, the brushed aluminum top and back likely does more for cooling, but if it was entirely black or entirely aluminum that would have been a nice touch.  As it is, the white will do – if you’re nit-picky about that sort of thing.

Synology DS413 Box (Small)
The Box the Disk Station arrived in. Plenty of pretty picture on all sides and top. There’s even links to partner companies listed in bullet format

Hardware
The power brick is a large, unflattering chunk of plastic – if only the power supply was embedded in the unit it would have saved me a little more space on my Rack.  There’s ample screws for hard drive installation, from 1.5mm to 2.5mm, flat and flushed heads: more than enough for 4 drives.  The drive trays are simple flat gray plastic with no rubberized anti-vibration absorption, but the engineers have  tightly integrated them into the NAS chassis, so there’s no movement anyway.  The front of the unit has seven LED indicator lights: Power, Status, LAN, and one LED for each hard drive inserted.  The colors are straightforward for anyone to understand as well: Green=Good, Red=Bad.  The middle power button is always blue, probably because it just looks cool.

DiskStation_DS413j_1 (Small)
Blinking LED indicators tell you at a quick glance what’s going on with power, LAN, and your Hard drives. No LCD display, but you can do everything from the DSM web GUI

Software
This is where the Synology really shines, after setting up and formatting hard drives (surprisingly quick), you are given a choice to either install the DSM from the Synology external update site or manually (you first download the package and point to it).  I did the latter and installed it from my laptop via a wireless connection.  Immediately after logging in, DSM tells you such items as uptime, resource monitoring, logs and current connections all as a pop up in the bottom right hand side.  The wizard can help you configure backup, router configuration for firewall and external port access and offers easy to read configuration items in the control panel from the start.

DSM Image 1
DSM treats your experience like another desktop, complete with icons, and Windows-esque useful health ‘gadgets’ such as health monitors, transfers, logs and whatever else you can decide from the drop down menus

Usability
Easily the most user friendly NAS device I’ve ever come across; the hardware is straightforward – plug in your drives, provide power and ethernet, and press the power button.  The Synology Disk Station Manager (DSM) AJAX web server is incredibly powerful and lightning quick, even from external access where my uploads are slower.  Mounting files from within the DSM was a snap, just open their File Station (equivalent of Explorer, or if you prefer, Finder) and mount the remote folder share you have on your network.  Creating users and groups is intuitive and fast, the linux style of read/access based on shares makes things much easier to figure out. The Packages are well put together and definitely have great business potential; such as the multiple CRM’s, Wiki abilities, Mailstation and VPN server.  Even the backups are dead simple; I configured my old linux based NAS into an Rsync location for the DS413J.  The dual USB ports even allow for plugging in of external hard disks for USB copy / backup jobs, and everything can be scheduled.  The system log is also very useful for tracking down changes and logins, as well as the health monitor that tells you every task-manager-esque what’s going on, who’s doing what and what processes are using CPU and memory.

Quick pic of currently installed packages on the DSM GUI.  You can add even more 3rd party applications that are handy like 'currently connected'
Quick pic of currently installed packages on the DSM GUI. You can add even more 3rd party applications that are handy like ‘currently connected’

Features
I only have great things to say about the DSM, it’s like logging into a new computer each time you add a new package.  The new features add a new dimension each time, allowing for further tweaks and functionality that wasn’t before present.  Some such as Media Server didn’t appeal to me, but others such as 3rd party add-ons like Switch Service and Current Connection make the experience much more informative.  With such features like Radius Server, I could now change my wireless encryption to an enterprise level format capable of local and ldap authentication protocols.  I’m sure the next time I’m a party, I’ll have to drop that nugget of information.  Other features such as media station helps create an internal website complete with thumbnails and auto-playing movies and streaming audio (even over the internet).  There’s so much power at the DSM’s disposal, that it would take a whole article for each add-on feature.

The DSM package center has endless possibilities with different configurations and applications with categories such as business, productivity, web and mail serving and more
The DSM package center has endless possibilities with different configurations and applications with items for business, productivity, web and mail serving and more

Performance
I struggled with the price and (theoretical) performance of the much meatier Synology 1512+.  When weighing price vs. performance, the 413J came out ahead and I save a few hundred dollars a result.  Synology Claims a maximum 53MBps Upload (write) and 108MBPs Download (read) on their website when working with a 5GB file and 1500MTU max over a 1Gbps LAN environment.  My own benchmarks were not far from the result, although I did tweak my settings with 9000MTU on the Synology and Intel NIC with Win7 64x Ultimate edition with a 5GB file and the speed was little over 50MBps for a write, and around 55MBps for a read.


Verdict
I am definitely sold on the Synology name brand.  The DSM software gives a user complete control of data, backups, security, and a whole plethora of other features with the additional Synology packages available for download.  With features like SSH ability at the flip of a switch, remote management that’s both easy, intuitive and icon based, I only have great things to say about the Synology DSM unit.  The price is right for this unit, larger Synology units can accommodate more hard drives, have greater integration with virtualization platforms and even greater transfer speeds.  For the home user with storage needs, it’s a near perfect offering.


Closing Thoughts
I wrote a ‘love letter to Drobo’ some time ago.  I revisited the Drobo box with hope that I my opinions would have changed.  Not surprisingly, I’m still disappointed with drobo’s performance and lack of options.  I stand by my original post,   the product feels unfinished and flaky, and under performs in simple tasks like file transfers.  Presented with both choices for a NAS device, I would pick the Synology 10 times out of 10.