

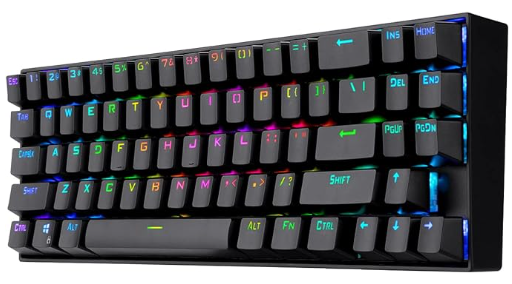

I’ve never tried a 75% keyboard before. And my original thoughts were that I wanted a True-typing experience. I certainly got that, and little more. Read on for my thoughts on the Redragon K599 Deimos mechanical keyboard.

70 keys, n-rollover (Basically means you can mash your palm into the keys and it detects each press individually), all sorts of brightness settings, and a cut-down version of the home/insert/pgup/pgdn/home/end keys.
So what’s all this mean?
Using the K599 as my daily driver
As a typing tool, this thing is awesome. It’s small enough not to clutter the desktop, has a satisfying click (Outemu Reds), and has a great backlight with all sorts of color options.
Pro’s
As mentioned, when used strictly as a typing tool this is fantastic. The form factor and layout doesn’t differ much from a standard 104 keyboard. Compared to the Surara K582 (a full sized 104 keyboard), I didn’t have to readjust anything. My fingers found home row about 80% of the time. There’s also the wireless 2.4Ghz dongle option which, I have only used sparingly just to ensure it works since I brought it home. And I like the USB-C connector cable. My desktop is apparently collecting all the USB-C devices for my phone, tablet, and rechargeable mouse, so having another is welcome. The connector is also removeable, which makes the entire package entirely portable with little fuss. This also weights a hefty amount, which makes it feel like a very premium keyboard for the price. Also, when doing tear down (to swap out the switches, and my own curiosity) it was very simple to disassemble.
- Great size!
- Wireless 2.4Ghz with dongle
- Removeable USB-C
- Good weight for price
- Arrow keys placement
- Easy disassembly
- Hot-swappable switches
- Multiple backlight options
- Multimedia key controls via FN+ press
Con’s
There’s some adjustment to this new device. Namely, my brain has been hardwired to reach for the INS/DEL/Home/End/pgup/pgdn keys in their 104-layout. I still have to physically look for those keys when typing (usually looking for the end or beginning of a line, or editing a document). I’m also very used to hitting the F-keys out of habit to do things like F2-Rename, Alt-F4 close, or F8-execute code (in Visual Studio). I find my fingers sometimes reach for that non-existent row, whereas now I need to use FN-# key assignment. There have also been a few times I miss the backspace or enter key, this is usually because my fingers are searching for the gap between the enter keys to the arrow keys. I personally wish this device came with a bluetooth option, or the ability to pair to another 2.4Ghz adapter. For anyone new using a mechanical keyboard, it’s worth noting the height difference; the K599 is about 3CM from the base to the top of the key, while many membrane keyboards are 2CM or lower. I suggest an wrist rest for extended sessions.
- Coming from standard 104-keyboard, there’s some adjustment: ins/del/home/end keys
- Adjustment for the F-row
- Adjustment for the Enter/Backspace keys
- Using the FN-key for LOTS of things
- Probably need a wrist rest
Disassembly
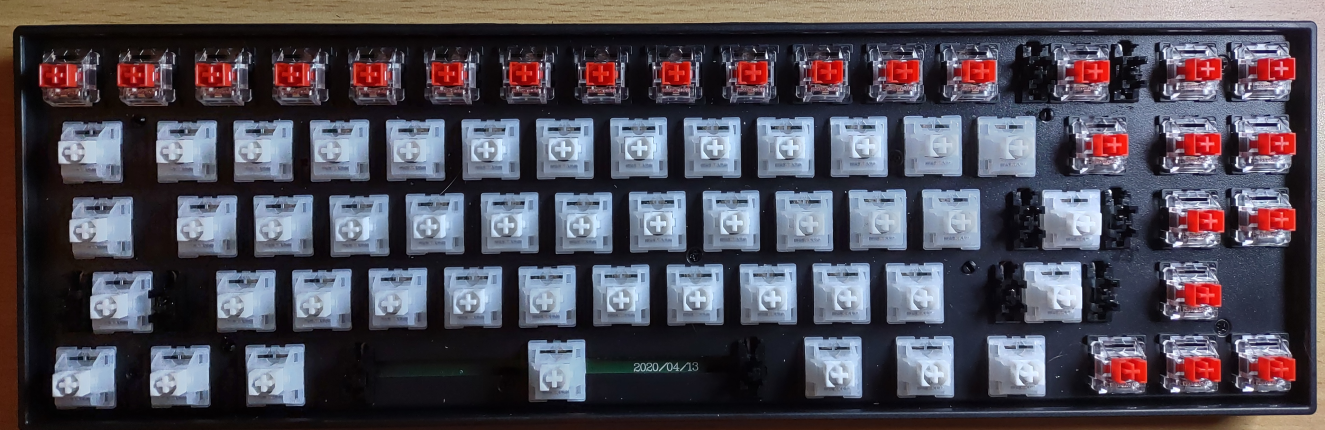
First, remove all the keycaps with the included ‘red key puller’ included with the package. Interestingly enough, this did not come with any additional switches or a switch puller. If you’re looking to mod, you may want to invest in a separate one. In my case, I had a spare one from my K582 set. After that, remove all the switches gently with the switch remover, I suggest clamping from top-bottom (rather than left right). Once that’s done you should have something similar to this:

There’s about 7 or 8 machine screws with philips heads. These are all the same length, so they can reinstalled in any order. Once all switches are removed you should have just the metal backplate:
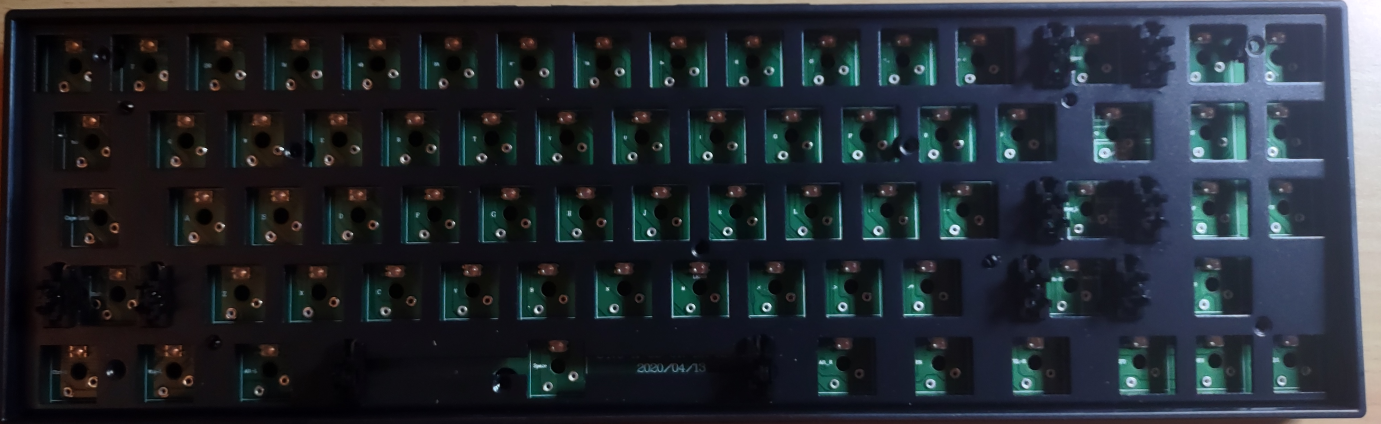
After the phlilips head machine screws are removed, pinch the plastic ‘grabbers’ together and lift the metal plate out.
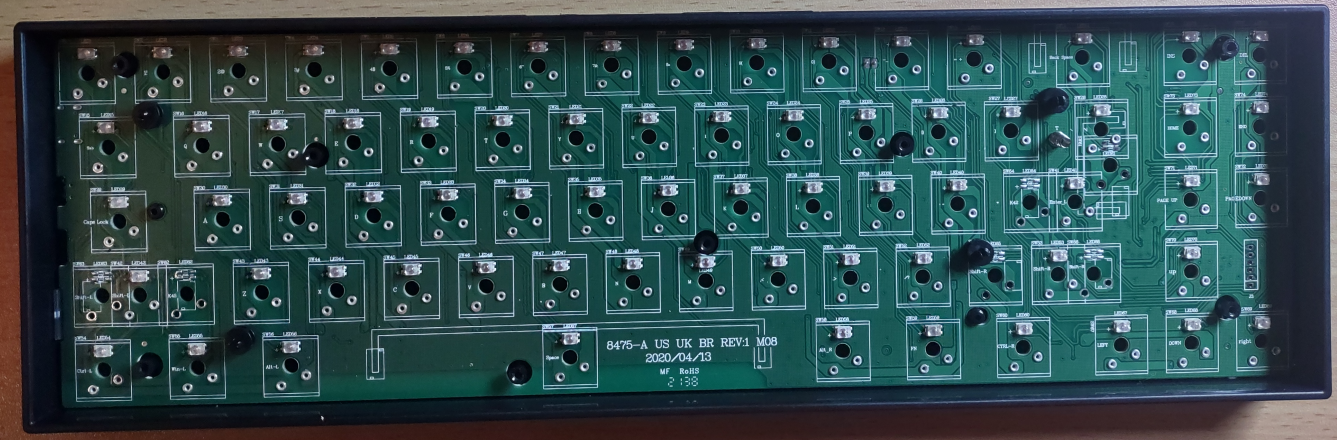
Above is the system PCB board in all it’s glory. Taking it step further, gently lift from the bottom (not the top) and you can see the bottom board and rechargeable battery.
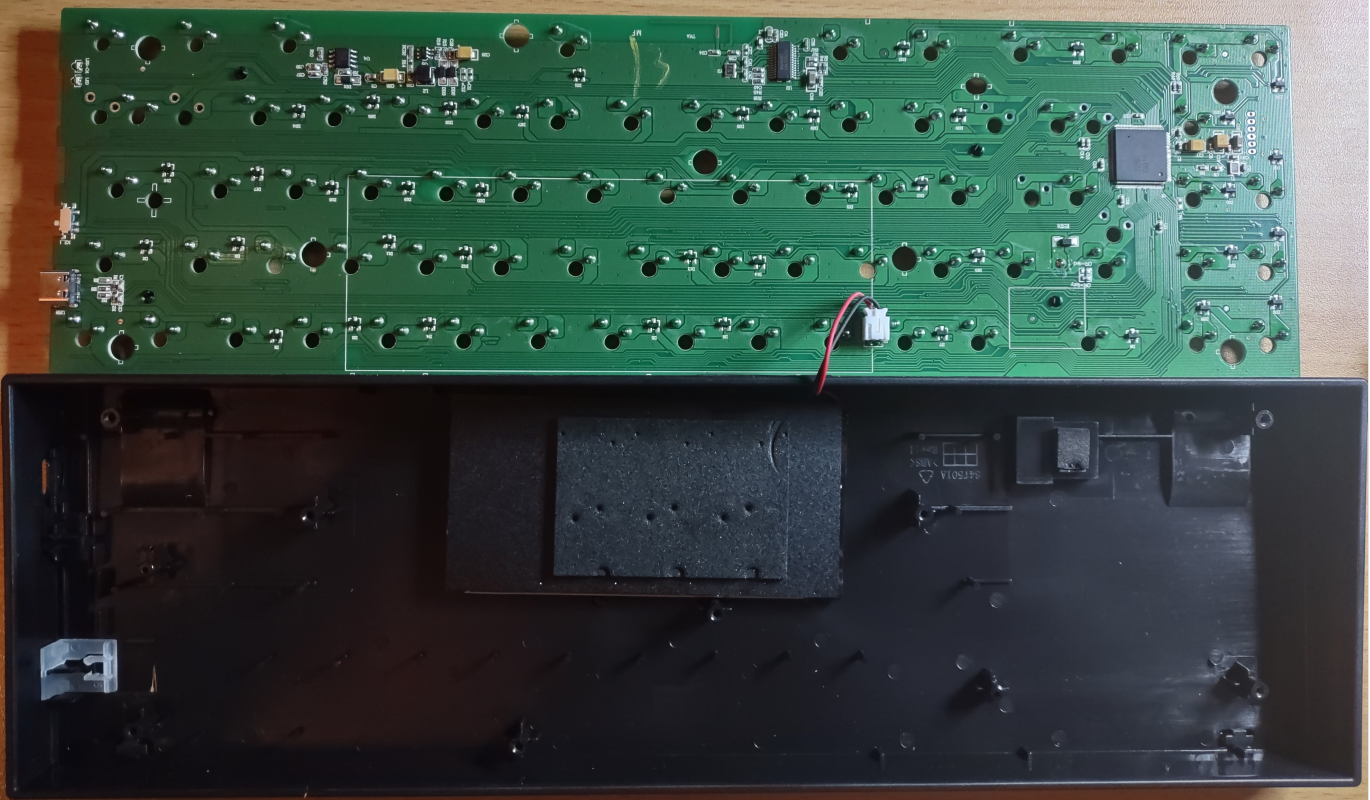
Be careful of the USB-C along the left hand side, since it’s soldered onto the board, just make sure it aligns up properly before screwing down the metal backplate.
The included outemu red switches, I also swapped out with AKKO Jelly CS Whites. These I like mainly because of the soft press, and these are slightly less noisy than the red’s. Just be careful when you’re putting the switches in, push them directly from the top, not off-set or anything, otherwise you might bend a pin.
Overall thoughts
For the money, this is a compact, beautiful looking keyboard with tons of functionality and usability. I personally find this board to the most comfortable of the bunch, at just the right size. I find this the most comfortable board for gaming or speed typing on monkeytype.com.