

This tutorial already assumes you have the following:
*Group Policy objects SPECIFICALLY for laptop computers
*CA certificate created
Group Policy can make your life easier especially if you have a large environment. It’s important to have a good, CLEAN Active Directory free of clutter or orphaned objects (re: objects you don’t know about). I suggest separating your computer accounts by PC and Laptop, laptops will get the wireless group policy while the PC’s won’t as they are typically hard lined into a RJ45 Jack.
First, create a new GPO: give it a meaningful name

Once created, drill down into Computer Configuration->Windows Settings->Wireless Network (802.11) Policies and create a new Windows Vista (AKA Windows 7-8) Policy. Tailor this to your needs, you can easily create a Windows XP Policy as the screens are very similar.

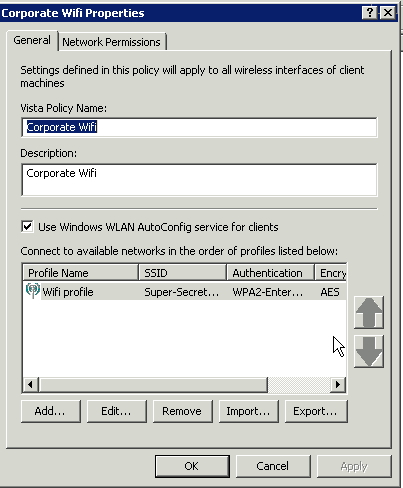
Create a Policy Name, I gave mine simply ‘Corporate Wifi’. I also used the Windows WLAN configuration utility. This means if you’re using the Dell connect utility or the HP connection manager this Group Policy will not work. Again, depending on the laptops you’re configuring you’ll have to make adjustments. This guide assumes you’re formatting laptops with standard Windows Operating Systems with no additional bloatware.
After giving it a policy name, add an Infrastructure network (on the bottom).

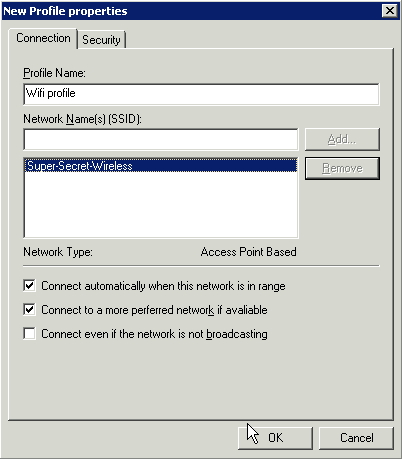
The Profile Name will be what shows the client is connected to – this means you have the opportunity to give your SSID another name to your internal employees. For this example, I have an SSID of ‘Super-Secret-Wireless’, but the Profile name is simply ‘Wifi profile’. When your users connect to wireless, they will only see they are connected to ‘Wifi profile’.
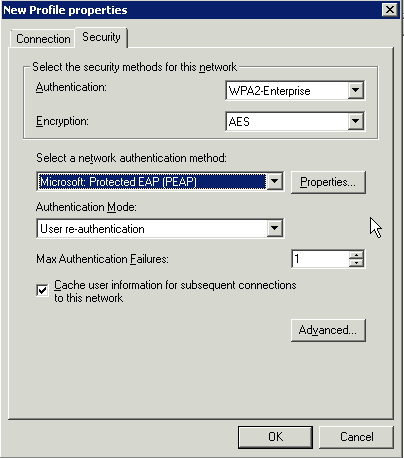
Click the Security Tab to change your SSID’s security settings. I’m using WP2-Enterprise authentication with PEAP and a certificate. To choose the certificate, click on Properties beside your authentication method.
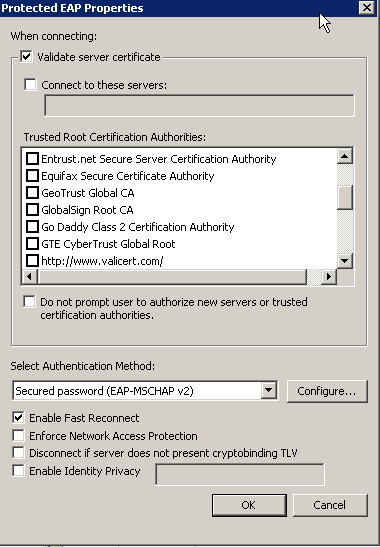
Ensure you’re validating the Server Certificate, then put a checkmark on the certificate you created in the first part of this tutorial. To ensure you clients have the certificate, you can use a GPO to install the certificate for you automatically.
Once you’ve added the profile, you’ll see it as one of the SSID’s in your associated Vista wireless policy
That’s about it. As long as your client has the certificate, and you force a GPUPDATE they should be connected to your new wireless without your need to touch every laptop.

The last tutorial was done on Server 2012, these screen caps were done from a 2008 server. Don’t worry, most of the content is still the same across both operating systems.